

Creating your first widget is simple!
Follow these 3 steps to get started.
We celebrate creativity and are inspired by how our users are pioneering spicy new workflows. We also champion innovation. If you want to build upon what already exists, check out some of our pre-built Dashboards.
☝️ Step 1
Create your Widget
Indify.co has multiple widgets for you to choose from. Simply log into your account, and you’ll see every widget option at the bottom of the page


Hover over the widget and click “+ Create widget”. It will then prompt you to give the widget a title, which is optional but highly recommended.
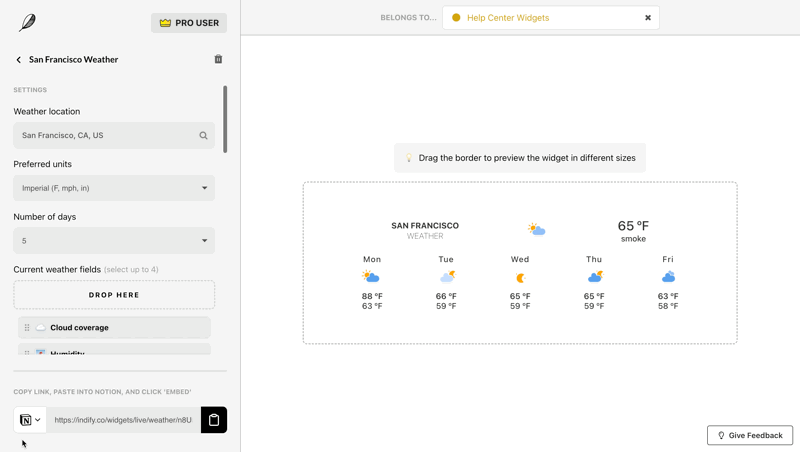
✌️ Step 2
Customize your widget

On the left-hand side of the configuration page, you can update various aspects of your widget, like the text, font styles, colors, content, and much more.
Indify is very customizable, and we’re constantly adding new ways to personalize your widgets to fit your needs.
👌 Step 3
Copy and paste your embed link
Once you’re satisfied with the widget you’ve created, scroll to the bottom of the configure menu and select from the dropdown where you want to embed the widget.

Once your link is copied, navigate to the application or platform you've selected and embed the widget.
Check out our guides to embedding your newly created widget onto Notion or your favorite productivity platforms here:
Explore our Widget Toolbox
